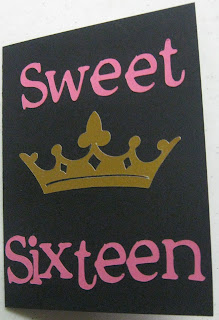
Sweet Sixteen Card
The card I made for Elise's birthday was super simple.
Supplies:
Black, Pink, Gold Cardstock
Adhesive
Tools:
Cricut
Potpourri Basket Cricut Cartridge
Simply Sweet Cricut Cartridge
Create-A-Critter Cricut Cartridge
Paper trimmer
Score board and bone folder
Instructions:
Cut a piece of black card stock to 5 1/2" X 8 1/2". Using the scoreboard and bone folder, fold card in half to form a 5 1/2" X 4 1/4" card. Using the Simply Sweet cartridge, cut the words "Sweet Sixteen" from the pink at 1". Using the Potpourri Basket cartridge, cut the crown using the shift function from gold at 3". Cut a 2" "Happy Birthday" from the Create-a-Critter cartridge from the gold and a "birthday" using the shift feature from the pink.
Adhere the crown to the center of the card and the words "Sweet Sixteen" above and below the crown. I put the words on randomly rather than trying to make these whimsical letters straight.
Adhere the pink "birthday" to the gold and attach both to the inside of the card.

The inspiration for this card came from the tiara and napkins we bought for the family party. The most difficult part was finding the fonts and shapes to use. Once that was done, the card was a breeze.
Supplies:
Black, Pink, Gold Cardstock
Adhesive
Tools:
Cricut
Potpourri Basket Cricut Cartridge
Simply Sweet Cricut Cartridge
Create-A-Critter Cricut Cartridge
Paper trimmer
Score board and bone folder
Instructions:
Cut a piece of black card stock to 5 1/2" X 8 1/2". Using the scoreboard and bone folder, fold card in half to form a 5 1/2" X 4 1/4" card. Using the Simply Sweet cartridge, cut the words "Sweet Sixteen" from the pink at 1". Using the Potpourri Basket cartridge, cut the crown using the shift function from gold at 3". Cut a 2" "Happy Birthday" from the Create-a-Critter cartridge from the gold and a "birthday" using the shift feature from the pink.
Adhere the crown to the center of the card and the words "Sweet Sixteen" above and below the crown. I put the words on randomly rather than trying to make these whimsical letters straight.
Adhere the pink "birthday" to the gold and attach both to the inside of the card.

The inspiration for this card came from the tiara and napkins we bought for the family party. The most difficult part was finding the fonts and shapes to use. Once that was done, the card was a breeze.


Comments