Posts

Showing posts from April, 2012

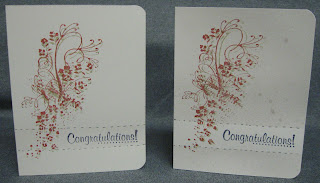
Banner Table Decoration

Image
I must admit that this was somewhat difficult to photograph in my small space.  I love the way it turned out though.  I had hoped to take a picture at the shower that I made this for, but was unable to.  I used the following tools and supplies: Paper from my stash 3 ivy bowels from Joann's Pink tissue paper from Walmart Styrofoam rectangle cut into blocks (wrapped in the tissue paper) Dowel rod cut into 10" pieces Rose metallic paint Heart brads from my stash. Cricut - CCR Exlusive -"Party Picks and Pennants" Cricut - Country Life Template - us cut a 5X5" square I hope you enjoy the video. Thanks for watching and have a great day.  The inspiration for this project came from Sarah at LiveloveandSCRAP on You Tube.

Apple Tag

Image
I love to make "gift baskets" using the gifts as part of the basket.  I did this for a bridal shower today.  The gift is a colander, spaghetti server, dishtowel, spaghetti, pasta sauce, and Parmesan cheese.  I had also placed a recipe in the basket as they were being collected for the bride. Of course, a great gift basket should have a great tag, right?  Though I had placed a card on the the inside, I decided that I needed to make a tag, so this is what I came up with. For information on the supplies and tools that I used to make this, please watch the video. Thanks for watching and have a great day.

April Haul

Image
In this post I show you some great deals that I bought from peachycheap.com and scrapace.com.  I also show you my newest die from Paper Trey Ink.  Thanks for stopping and have a great day.

What's For Dinner?

Image
So today I have a not-so-crafty-but-oh-so-yummy post and a bit of rambling so please bear with me. Early in March, I created a new chore plan for our household.  I divided the house into zones and divided the chores between the 4 of us.  Unfortunately, shortly after the plan was created, my father-in-law took a turn for the worse and passed away.  The "plan" flew out the door while we were trying to keep up with normal living and cleanliness.  This week we started back into the plan - which will be explained more thoroughly when I have a chance to create the control board for the plan.  I couldn't wait to institute the plan until the pretty control board is made, so we started it back up this week with paper lists on the fridge.  Part of the plan includes who cooks and when.  This ensures my family is fed on the nights when I work and the ones when my daughter works.  So far so good.  Today was my day to cook.  I knew we were out of spaghetti sauce in the freezer so I c

Tips

Image
This video is just one that I put together to share some tips with you.  I hope you find it helpful. Thanks for watching and have a great day.

Alligator Birthday Card & More

Image
I have to admit that I have not had such a bad case of "can't leave well enough alone-itis" when it comes to crafting in a long time.  I have been wanting to use this new die from Paper Trey Ink for quite awhile, but just haven't taken the time to play with it.  It is a spinner die and I really had fun with it. I am entering this project in several challenges: Crafty Friends - Use 2 Die Cuts Joyful Stamper: Inspire Me Friday - Anything Goes Paper Playtime "Say it with Sentiments - Birthday" Party Time Tuesdays - Anything Goes + Kraft   So let's get started This is the front of the card.  After the video, I added glossy accents to the alligator and white gel pen to the blue behind him.  The sign is made from brown and Kraft scraps and the Camp Out cartridge.  The grass is from Kate's ABC's in various green scraps.  The water paper is from Hot Off the Press.  I'm not sure where the gold bop letters came from.  The dark blue an

Dad's Day Cards

Image
Today I have several cards that I made for Operation Write Home as well as for my own dad.  This post will be pretty photo heavy as well as a video tutorial, so let's get started. Now I know that the video is longer than normal, but in it I walk you through making 3 cards as well as show you some other variations I made.  A little variety is a good thing, don't you think? I used Papertrey Ink "Kraft" card stock for my base.  The black came from a package of black that I have, but I don't remember which brand.  The colored pieces were all scraps from my scrap stash.  The letters I used were from EK Success as well as some very old letters I had in my stash.  I used K. Andrew Designs "Of Mice and Lil' Men"as well as "Owly Hoo" to stamp the sentiments.  3 Girl Jam "Witches Brew" is used on the one version of the card that has ribbon on it.  The "stitching" was made with a black Zig pen and all the stamping was do

Shower Invitation

Image
Today's project is one that I made for a special young lady who will soon be getting married.  Our little church is hosting a shower for her next week and we wanted her to have special invitations for it. I used the following supplies and tools: Pink and Burgundy card stock from my stash.  White card stock is Georgia Pacific Burgundy trim from JoAnns Spellbinders Nestabilities - Labels #2 Stylized Flowers - Cuttlebug folder Tim Holtz "Heartfelt" stamp set and "Victorian Velvet" Distress Ink Black adhesive flat back pearls from Want2Scrap I am entering this in the following challenges: Little Scrap Pieces - Use Purple and/or Pink Craft Your Passion Challenges - Use die cuts and punches Joyful Stamper: Inspire Me Fridays - Anything Goes Craft Friends Challenge: #2 - Use 2 dies (I really did use 2 different sizes from this die set to make the sentiment and frame) Now I must admit that this video is a little "blurry".  I have a lot

One Layer Congratulations Card

Image
Hello, my crafty friends (and of course my non-crafty friends as well).  I'm so happy you could join me today.  I have a card that I designed in my head last night to show you.  Of course, creating it in my crafty space took so much more than it did in my head.  That's OK, because I absolutely love the way it turned out and plan to try some more using the same ideas. I plan to enter this card in several challenges.  I had these in mind when I was designing in my head. Party Time Tuesday #64 - Color/ Picture Inspiration Challenge For this one we were supposed to use the colors and/ or picture and make our take on it.  I didn't use all the colors, but I did use the green and black (Plus the red was "close").  This was my inspiration from the photo. Little Scrap Pieces - Use a Flower I don't think this one requires much explanation :) Less is More - One Layer Card For this challenge you were supposed to also include DOODLING.  I don't usually

Reach for the Stars - Birthday Card

Image
Today, I have a card that I made for my nephew.  It's hard to believe that he turned 5!  This was so much fun to make. I used the rocket from Imagine More Cards for the front of my card.  K & Co "Hopscotch" provided the perfect patterned paper and the red really makes it pop.  I finished it off on the inside using the  K. Andrew Design's "Of Mice and Lil' Men" stamp set and and more of the paper for the trim.  The brads are from Basic Grey and coordinate with the "Life of the Party" set.  I think it's perfect for a 5 year old, don't you? I am linking this card to:   Paper Playtime's "Say It With Sentiments" Challenge My Craft Spot: "Make it Pop" Monday Challenge   Thanks so much for watching and have a great day!

Kick Up Your Heels Birthday Card

Image
This card is one of my favorite projects in the the Cricut Craft Room so far.  I used the card shape I wanted from "Imagine More Cards".  However, the patterned paper, letter "P", and boot came from the Imagine "Country Carnival".  How fun is that? I finished the inside using 3 sets of stamps from K. Andrew Designs.  I used "Fashionable Friends" for "Kick up your heels".  I then combined "Happy" from "Owly Hoo" with "Birthday" from "Coffee & Tea for You & Me". I am linking this project to Crafty Friends Challenge #2 - Use 2 die cuts I hope you enjoy the video.  Thanks for watching and have a great day!

"Sky's the Limit" Birthday Card

Image
I really like the colors that make up this masculine birthday card.  It was so fun to make it for my brother-in-law. The printed paper is from a 6X6" pad from My Mind's Eye - Fine and Dandy.  I only used one piece of this paper because it is double sided. The striped kite paper is a scrap from my stash as is the brown.  The solid yellow paper is from Recollections and the stamp from Stampendous' "happy Messages".  The kite is from "Create-A-Critter". You know that I prefer to have the inside of my cards finished, so I used more patterned paper and stamps from K. Andrew Designs' "Of Mice and Lil' Men".  Please enjoy the video. I am linking this to the Paper Playtime: CH #73 - "Say It With Sentiments" Challenge

Easter Treat Jar

Image
This video is a little treat container that I made for someone.  Unfortunately, I forgot to take a photograph, so I trust the video will help.  Thanks for watching it and have a great day!

Slow Poke Birthday Card

Image
This is the first card I made using the Cricut Craft Room.  I'm going to really enjoy using this tool.  I was able to change out the pattern on the paper quite easily.  I was also able position the images where I wanted them on the mat.  This is something I hadn't figured out how to do on the Imagine itself.  I like having that versatility so that I can use different sizes of paper.  I really hope my sister-in-law likes this late card. I'm linking this to the  My Craft Spot: Inside Out Challenge Thanks for watching and have a great day.

"He is Risen" tags

Image
I love Easter and I try to give my family a little basket of goodies each year.  This year, I added little tags to my kids' baskets.  If you missed the card that I made for my husband's basket, you can view it by clicking here .  On to this project...  These tags were really easy to make using tags made from Tags, Bags, Boxes, and More that I had already made and were tucked away.  Priam flowers, distress inks, and stamps from Studio G add beauty.  I made the eggs using Doodlecharms. Unfortunately, the picture I had taken of these tags appears to be damaged.  I hope you can see them well enough on the video to get the idea.  Thanks for stopping by and have a great day.

Faded Flower Card

Image
Here is a card I made for my sister's birthday.  I used a stamping on technique to make the faded flowers.  I sent the red one to her because she likes red.  I trust you will enjoy the tutorial on this super simple card. I am entering this card in the following challenges: Simon Says Stamp - April Showers Bring Spring Flowers   Less is More - CAS 3 Shades of Green (I'm not sure if there is enough white space to qualify, but this was definitely clean and simple.) Have a great day.

5 Minute Card Challenge

Image
I was watching a YouTube video by K. Werner Designs yesterday and she attempted to make a card in 5 minutes.  You can see this fun video here .  I watch her videos every week because she makes such neat cards.  At the end of her video, she challenged others to do the same thing.  Here's my attempt. Did I make it in 5 minutes?  That's kind of laughable.  I was close, but then had a mishap.  You'll have to watch the video.  It was fun to try though.  I really like the way the card turned out, so I made a similar one a second time. I am linking this card to the following challenge: Love to Crop - Say Anything Thanks for watching and have a great day!

Egg Shaped Card

Image
I am in a huge hurry but wanted to post one of the recent cards I made.  For more information, please view the video.  I am linking this to the following challenges:   Getting Cricky - Favorite Project 4 Crafty Chicks - Flowers Have a great day!

100th Video Giveaway Winner

The winner of the 100th Video Giveaway is Rhonda Miller Please send me a message (or leave a comment here with your address - I won't post it if you do), and I'll get that in the mail soon. Unfortunately, we didn't reach 100 subscribers, so I'll be working on a great giveaway for when that happens.  Keep posted for some great projects.  I have recently completed 4 projects with videos that need to be completed and posted.  Have a great day!

"Stopping By To Say" card

Image
Hello my bloggie friends.  I trust today finds you happy and resting in the joy of the Lord.  I will admit that the main thing I have accomplished today is keeping my pajamas warm.  As close as I can figure I worked around 55 hours in the last 4 days and am exhausted!  I did manage to squeeze in a card in those few days that I wanted to post for you. Add caption I used a sketch from Erica's Craft Room for her current challenge.  I just wanted to make a simple invitation for dinner on Easter.  This sketch was perfect for it.  I'm also really excited to have found the postage stamp cut on Elegant Edges.  I have wanted to use this cut, but only thought that I had it on an Imagine cartridge.  Using mycutsearch.com, I discovered that Elegant Edges had it as well.  Woot woot!  I see other cards with this cut in the future. Supplies: Vintage Cream cardstock - Paper Trey Ink (8 1/2" X 5 1/2" - scored at 4 1/4 to form A2 card) Yellow cardstock - My stash (4 1/8"