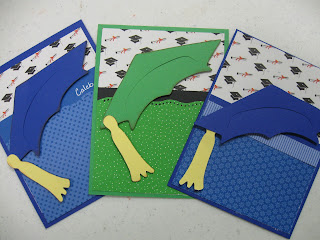
Graduation Cards
These are some of the simple portrait cards I made for graduation this year. I had originally planned to use the graduate from "Everyday Paper Dolls" (cut at 3.5"). After they were cut and the first card assembled, I realized that they were a little juvenile for the high school graduates. I did use one of them for a middle school graduation, but didn't get it photographed. Each card was a little different and I used each graduate's "colors" for the base. Here is the summary of the cards:
The base of each card was cut at 11" X 4.25". They were scored at 5.5" and folded to form a portrait card. The mortarboard was cut twice for each card - one in the base color and one in yellow for the tassel. They were cut at 2.25" with the real dial size "on" from "Everyday Paper Dolls". They were then inked (I'm not sure which color chalk ink I used) and assembled. The graduation paper was cut at 4" X 5.25" and adhered to the front of each card. The bottom printed paper was cut at 4" X 2.5" and adhered to the bottom of the card. Some of these printed papers were punched with a border punch and a small trim piece approximately 0.5" X 4" was placed behind each printed piece. Others were decorated with 2 small trim pieces. As you can see, there wasn't much precision to these cards. The mortarboard was finally adhered to the front of the card with dimensional adhesive. These were not elegant cards, but were quick cards to be mass produced.
Supplies:
Cardstock - blue and green shown (from my stash)
Graduation paper - Hot Off the Press
Printed paper - I believe the blue printed papers shown were double-sided papers from Doodlebug and the green was from an old "Bitty Pad" I had from Provo Craft
Adhesive - ATG, dimensional
Color Box chalk ink
Tools:
Cricut
Cricut - Everyday Paper Dolls
Martha Stewart Score Board


Comments