Posts

Showing posts with the label My Mind's Eye

"Love you more than coffee" Birthday Card
Image
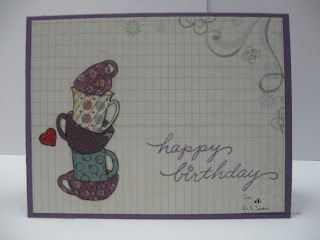
A while back I posted a gift bag that I altered for a friend.  At the time, I also made a card that I want to share with you Supplies: Paper Trey Ink - Latte Love stamp set and Plum cardstock My Mind's Eye - So Sophie American Crafts - red glitter tape Stampendous - Happy Messages stamp set Memento - Tuxedo black ink Tim Holtz Distress Ink - Bard Door and Dusty Concord Tim Holtz Distress Markers - Barn Door and Black Soot Sakura - Gelly Roll Stardust pen Thanks for stopping by today.  Remember to take some time to enjoy the little things.

Dress Form Tags

Image
Tags are so fun to make.  I recently participated in a dress form tag swap over at Art and Sassy.  You can find out about their swaps by clicking here .  In the meantime how about some tags?  I made 4 tags for the swap and a 5th for me. All the tags used the following items: Claudine Helmeth Sticky Back Canvas Score-tape and ATG adhesive #5 Avery Tags K. Andrews "Sew Much Fun" My Mind's Eye "Princess Blush" stamp set Lace Charms and O rings The first tag is the one that I kept for myself.  In addition to the other items, I also used: Purple Gelato Dusty Concord Distress Ink Recollections bling SEI "Couture" 6X6 paper 3 Girl JAM - Witch's Brew and Antique White ribbon   Without a doubt, the second tag is one of my favorite ones of the set.  The colors remind me of the sunset.  The additional items I used were: 3 Girl JAM - Sunflower and Harvest Orange ribbon Yellow and orange Gelato Prima bling flower Vintage Photo Distr...

Lemonade Paper Bag Cards

Image
Good Morning everyone.  I trust you are having a great day and are looking forward to a good weekend.  I know that much of the country is hot so I think this card is perfect for today.  This card was designed for a swap over at Art & Sassy. For more information on their great swaps, click here .  I made 3 cards for the swap and have an extra one to encourage someone else. For this swap, I used the following items: Paper lunch sacks from the dollar store "Ice Blue" ribbon from 3 Girl JAM ( here ) Recollections - yellow paper from the Spice Market and Jewel packs My Mind's Eye - Stella and Rose "Hattie Papers" in 6X6 Close to My Heart - Indian Corn Blue ink Memento - Tuxedo Black ink TPC Studio stamps - Slice of Life Spellbinders and Cuttlebug Clear glitter glue Scrappy tape and ATG adhesive After I was all finished, I went to the dollar store and bought a box of individually wrapped lemonade packets.  I stuck a couple in each front ...

Birthday Balloons Window Card

Image
Good morning everyone.  I hope you are having a beautiful day.  If you are coming over from the 3 Girl JAM challenge blog - welcome. I have seen several different "window" cards lately and I wanted to give it a try so I decided that these birthday balloons would work well.  I also wanted to make this card for an adult male so I wanted it to be more muted and in masculine colors. I used the following supplies and tools: 3 Girl JAM - Gold Crown from the Royal Bundle Paper: Paper Trey Ink (Kraft & Vintage Cream), The Paper Studio (Brown from the Cyprus collection), My Mind's Eye (Fine & Dandy Boy) Inks: Distress (Peeled Paint, Dusty Concord, Wild Honey), Ranger Archival (Coffee) Studio G Glitter Glue Hero Arts: "All Occasion Messages" stamp set and Stamp and Cut - "Balloons" Spellbinders: Labels Number 5 with the Cuttlebug Micron Pen: Black The video today is a bit longer than normal, so thanks for taking the time to view it. ...

Whole Heart Just Because Card

Image
Good morning.  I trust you are having a great week.  I wanted to share this little "just because" card that I made for my husband the other day.  It was a fairly simple card and I think he liked it. Supplies: 3 Girl JAM ribbon - Tuxedo Black DCWV - Tattered Time matstack Tim Holtz - word sticks Memento Tuxedo Black ink My Mind's Eye - Miss Caroline sentiment stamps Core'dinations cardstock from Joann's Brads (I believe they were from Making Memories.  I bought them a long time ago on clearance.) Thanks so much for stopping by today.  Remember to take some time to enjoy the little things.

Piles of Circles Cards

Image
Hello everyone.  I trust you are having a great day.  Today I have chosen a card that was inspired by another card.  Once again, I saw the original in a tutorial from Operation Write Home.  As soon as I saw this card, I loved the design and knew it would be a perfect use of scraps.  I made my design after looking at the picture once, so it obviously isn't an exact copycat.  I hadn't even looked at the original post so I don't know the sizes she used.  If you would like to check out the original post, please click here . If you watch the video, I focused on making the following card: At the end of the video I added a bonus card.  This is one of my favorite recent cards. I used the following supplies to make these 2 cards: Thank You - Scraps from My Mind's Eye - "Fine and Dandy" Martha Stewart - 1" circle punch Hero Arts - "All Occasion Messages" stamp set White embossing powder Versamark Ink Washi tape from Target Coredinations ...

Grid Birthday Cards

Image
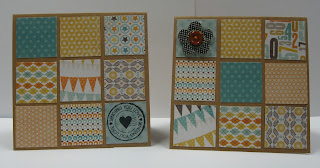
Hello friends.  I trust you are having a good day.  After a bit of down time, I actually have a crafty post for you today.  Look for more to come.  I have counted the cards that I need to make to get caught up and I need 12 more birthday cards to catch me up to June 1st.  I also have 3 wedding cards and an unknown number of graduation cards and thank you notes to make. I used a sketch from Operation Write Home which can be found here .  I also used the following supplies: Hero Arts - Blessings to You stamp set My Mind's Eye - Fine and Dandy Paper pack Basic Grey Bloomers - Wander collection Memento Tuxedo Black Ink Coordinations "Krafty" cardstock Stampendous - Happy Messages stamp set If you are interested in the measurements and a quick tutorial, check out the video. Click here to view the video.   For some reason, I am having difficulty linking my video to this post. Thanks so much for stopping by. Remember to take some time to en...

Simple Sketch Inspired Cards

Image
Today I wanted to show you 3 of the simplest cards I've made in a long time.  They were styled after another Operation Write Home sketch that you can find here .  These sketches are really helping me get caught up right now and I'm so thankful for them.  Remember that using a sketch doesn't take away your own creativity or flair.  A sketch is just a springboard to jump to your own ideas. The first card I made was from the Basic Grey "Life of the Party" 6X6 pad and Element stickers.  The blue card base was something I found in my stash.  I think this will be a perfect male or kid birthday card, don't you? I decided to take a border from the Element sticker sheet to finish off the inside.  Hero Art's "All Occasion Messages" had the perfect little happy birthday sentiment to finish it off with Archival "Jet Black" ink. The second card is definitely for a lady.  I pulled out the "So Sophie" 6X6 pad, Basic Grey "...

Birthday Balloons and More

Image
Hello, I hope you are having a great day.  I am plugging away at birthday cards. I thought I would share 3 of them with you today.  Grab some Daffodil and Harvest Orange 3 Girl JAM ribbon and come and play along. I must admit that this card was really easy to make and I had a lot of fun doing it.  Here's what I used along with the 3 Girl JAM ribbon: Basic Grey - "Life of the Party" 6X6 paper pad and element stickers. Adhesive Blue cardstock cut at 5.5"X8.5" Dusty Durango ink - Stampin' Up Hero Arts - All Occasion Messages (inside sentiment) Operation Write Home - Bonus Sketch #13 (Click here to get yours) Now for the bonus cards... If you look at the purple ones closely, you can see that the purple floral paper is slightly different on each of them. Paper - Paper Trey Inc - Plum Pudding and Vintage Cream; My Mind's Eye - So Sophie 6X6 pad Rich Razzleberry ink - Stampin' Up Daffodil crinkle ribbon - 3 Girl ...

Anniversary Card

Image
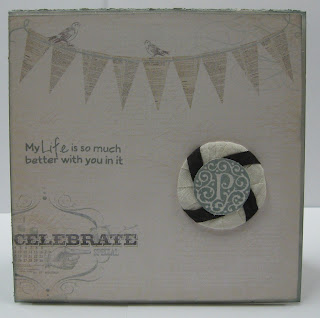
Good morning everyone.  I trust you are having a great start to this new year.  OK it's not really a secret, but 22 years ago I started out the new year right.  I married my best friend on January 1.  Why we chose that date is a bit of a story, so we will skip that for now and get on to the project.  I really wanted to make my husband a special card.  Hot chocolate and antique white 3 Girl JAM ribbon provided a nice finishing touch. To make the ribbon medallion, I pulled out my 2" Fiskars circle punch, and my 1" Martha Stewart circle punch.  I punched a 2" circle out of a scrap of card stock and then punched the middle out using the 1" punch.  I twisted the antique white ribbon around the disk and glued it down with Scotch Quick Dry.  I then folded a piece of hot chocolate ribbon in half and added the accent color.  The "P" was stamped on a piece of Paper Trey Ink Vintage Cream card stock using a CTMH monogram stamp and Iced Spruce...

Gift Card Holder for a Guy

Image
We all know that you can use ribbon on cards for girls right?  Of course, its great for holidays and babies.  You can even squeeze it in on kid's cards now and then.  But how about those cards we need to make for all the guys on our lists?  Today, I'm going to show you that you can.  So grab your 3 Girl JAM Harvest Orange ribbon and come play along. I wanted to make a little card that I could tuck a gift card into.  I pulled out my Cricut Artiste cartridge from Close To My Heart and cut this little card at 3" using the card feature and the "j" key.  I pulled a brown sheet of 8 1/2" X 11" cardstock from my stash.  Since I had everything loaded, I went ahead and cut 2 cards out at the same time.  Now I have a card to use later. I pulled a piece of paper from the MME "Fine and Dandy" 6X6 pad and cut a piece at 2 7/8" X 3 7/8" for the back and a piece at 2 7/8" X 3 5/8" for the front.  I then found my "Happy M...

Dressing Up An Envelope

Image
After  making the odd-sized card you saw in yesterday's post, I needed an envelope to put it in.  To make it, I pulled out my Martha Stewart Scoreboard and a piece of 12X12 white cardstock and made one.  Then I went to work to make it classy.  After all, a great card should have a great envelope, right? I think this postcard paper from the My Mind's Eye Cowboy 6X6 pad was perfect for the envelope.  Plus it coordinates perfectly with the card. Supplies needed: My Mind's Eye - Cowboy 6X6 pad DCWV - Shimmer Stack Distress Ink - Iced Spruce and Antique Linen Gold "Bop" letter stickers (Sorry, I can't remember where I got these but I believe it was from Provo Craft or Pioneer.) In this video, I walk you through the decorating process, though not the actual making of the envelope. Thanks for stopping by today.  Remember to take some time to enjoy the little things.

Shabby Numbers Birthday Card

Image
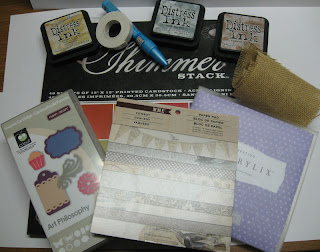
I trust you are having a supercalifragilisticexpealidoscious day!  I had a very busy work day and I am so happy to be home and in my comfy PJ's.  I made a fabulous card for my little brother's birthday.  I even thought that I made a video...until I went to turn it off.  That's when I discovered that I had never turned it ON!  Oops.  So instead, I have an old-fashioned tutorial for you.  So without further ado... Here are most of the items that I used to make this card: 3 Girl Jam - burlap trim Close to My Heart - Art Philosophy Cricut cartridge; Celebrations stamp set (Artist pack exclusive) Paper Trey Ink - Vintage Cream cardstock Distress Ink - antique linen, iced spruce, frayed burlap My Mind's Eye - Cowboy 6X6 pad Adhesive - Zig glue pin, foam adhesive, ATG, yQuick Dr To start with, I made the base of my card from the DCWV Shimmer stack.  This sparkly paper was cut at 6"X12" and scored at 6" to from a 6" square card.  I sa...

Gift Bags

Image
September 30 is the last day to enter my giveaway.  Click here to find out how to enter. As mentioned in my last post, I had a great time paper crafting with my friend Pamela last Saturday.  These bags are not related (though they did go to 2 members of the same family), but I decided to post them together.  How many bags can one person see anyway? The first bag held a little treat for my friend Kathy.  It coordinates perfectly with the card that I made for her and posted earlier.  I used the same papers.  (BTW - I found out that the swirly teal paper was from My Little Shoebox). I started with the same papers used on the card.  I then added a black doily and a white one from the Owl and Thistle Etsy shop.  More Prima "Say it with pearls" bling added a special touch.  I then used the dress form stamp from the My Mind's Eye Lost and Found 2 "Blush" stamp set and stamped it in Ranger Archival black ink on PTI Vintage Cream card stock....

New ATC's and Ramblings

Image
I have to say that there are some exciting things coming up in the next few days.  First of all, I only have 6 more followers to go until I reach 100.  Can you believe it?  Almost there.  I recently cleaned and organized my crafty space and I found a few more items to add to the give-away.  Be sure and tell your friends.  We're almost there! While getting some things ready for a swap at Craft Happens (shh... that post will be coming soon), I realized that I didn't have enough ATC cards to send with the projects.  I decided to whip up a few more.  Here they are: These are similar to my first set, but a bit simpler.  Just wait for some fancy ones coming sometime in the next few weeks!  I can't wait to share those too.  For these I used the following products: Stamps - K. Andrew Designs "Crafty Friends"; Tim Holtz "Joyful Song"; MME "Princess Blush" Paper - scraps from my stash Inks - Ranger Archival Black; Distress inks - ...

ATC

Image
Tonight was my first attempt at Artist Trading Cards (ATC's).  I'm very pleased with the way they turned out.  I used the "Crafty Friends" stamp set for one side of the card.  You can purchase these super stamps by clinking on the image below. Kristal donates a portion of the sales of every stamp set to charity.  These high quality stamps are also made in the USA.  You can't beat that! I also used the following stamp sets - Tim Holtz "Joyful Song" Tim Holtz "Playful Journey" MME - "Princess - Blush" I then found a couple of muslin bags to store these in. I hope you enjoy the video.  Thanks for watching!