Posts

Showing posts with the label Stampendous

Cupcake Birthday Card

Image
No matter how old you are, you should have fun on your birthday.  I needed a birthday card for an adult, but I wanted it to be fun so this is what I made: I needed the following items to make it all come together: Close To My Heart - Art Philosophy cartridge and coordinating stamp set (for cupcake cut at 2.5") Zig pens - Pure Yellow and Candy Pink DCWV Nana's Kids Matstack Georgia Pacific white cardstock Scrap of green paper Happy Messages stamp set from Stampendous Memento Tuxedo Black stamp pad Sakura Gelly Roll pen - Stardust Clear foam tape For full details, check out the video below. Thanks so much for stopping by today.  Remember to take some time to enjoy the little things.

Altered Scrapbook Sketch Card

Image
Today I have something to share with you that I've never tried before.  I took a scrapbook sketch and turned into a standard A2 card sketch.  I love the way it turned out and hope you will too. I started by choosing a sketch that was originally posted on Srapbook Challenges.  If you click on the sketch, you will be taken to the original sketch.  They have lots of fun sketches for all you scrapbookers. I then created my own sketch to make it fit on a standard 4.25" X 5.5" card.  Each of the banner ribbons were cut  at 3/8" wide. Now it was time to create the card.  I needed the following supplies to pull it off: DCWV - The Tradewinds Matstack Core'dinations "Timeless" Textured Cardstock (grey) Georgia Pacific white cardstock Stampendous "Happy Messages" stamps Close To My Heart - Outdoor Denim ink Fiskars "Upper Crest" border punch EK Success 1 3/8" circle punch Martha Stewart Butterfly punc...

"Love you more than coffee" Birthday Card

Image
A while back I posted a gift bag that I altered for a friend.  At the time, I also made a card that I want to share with you Supplies: Paper Trey Ink - Latte Love stamp set and Plum cardstock My Mind's Eye - So Sophie American Crafts - red glitter tape Stampendous - Happy Messages stamp set Memento - Tuxedo black ink Tim Holtz Distress Ink - Bard Door and Dusty Concord Tim Holtz Distress Markers - Barn Door and Black Soot Sakura - Gelly Roll Stardust pen Thanks for stopping by today.  Remember to take some time to enjoy the little things.
OWH Sketch #182 Challenge Cards

Image
As soon as I saw the current sketch at Operation Write Home, I knew that I had to use it to make some cards.  I needed to make a sympathy card as well as a thank you card.  However, by the time I stopped for the night, I had made 9 different cards with variations of this sketch.  Actually, the paper used for 2 of the cards didn't fit the sketch, so we will just call them bonus cards.  With the exception of the card bases, all the cards were made using scraps. Some sketches are just perfect for scraps.  Now on to the cards: Supplies: K&Company "ancestry.com" paper pack Paper Trey Ink - Vintage Cream Cardstock Memento Tuxedo Black ink K. Andrew Designs - Sympathetic Sayings stamp set Supplies: Scraps from my stash Paper Trey Ink - Vintage Cream Cardstock Barn Red - Distress Ink marker Stampendous - "Happy Messages" stamp set MME - Lime Twist twine - red/ white Archival "Coffee" ink Supplies: Paper Trey Ink - White card...

Thank You Notes - Tutorial for OWH's Memorial Day Bloghop

Image
Tomorrow (or today, depending on where you are located), there is a fun blog hop going on over at Operation Write Home.  I am really excited to be part of this fun hop and can't wait to hop along and see all the other inspiration.  The theme is "Thank You" and the challenge is to use an OWH sketch.  Did I say challenge?  OWH sketches actually simplify card making and are a great springboard for enhancing creativity.  I love them and use them often. This tutorial is actually for the hop.  However, there's a bit of a catch.  The tutorial is for one card and the card that I'm posting for the hop is going to be a bit different.  Same techniques - different results.  So be sure to check out both. For today's card I used the following supplies: Prima Leeza Gibbons "Wishes and Dreams" 12X12 cardstock Bazzill "Nougat" and cream cardstock Archival "Coffee" ink "Thank You" stamp from Stampendous "Hap...

Grid Birthday Cards

Image
Hello friends.  I trust you are having a good day.  After a bit of down time, I actually have a crafty post for you today.  Look for more to come.  I have counted the cards that I need to make to get caught up and I need 12 more birthday cards to catch me up to June 1st.  I also have 3 wedding cards and an unknown number of graduation cards and thank you notes to make. I used a sketch from Operation Write Home which can be found here .  I also used the following supplies: Hero Arts - Blessings to You stamp set My Mind's Eye - Fine and Dandy Paper pack Basic Grey Bloomers - Wander collection Memento Tuxedo Black Ink Coordinations "Krafty" cardstock Stampendous - Happy Messages stamp set If you are interested in the measurements and a quick tutorial, check out the video. Click here to view the video.   For some reason, I am having difficulty linking my video to this post. Thanks so much for stopping by. Remember to take some time to en...

Simple Sketch Inspired Cards

Image
Today I wanted to show you 3 of the simplest cards I've made in a long time.  They were styled after another Operation Write Home sketch that you can find here .  These sketches are really helping me get caught up right now and I'm so thankful for them.  Remember that using a sketch doesn't take away your own creativity or flair.  A sketch is just a springboard to jump to your own ideas. The first card I made was from the Basic Grey "Life of the Party" 6X6 pad and Element stickers.  The blue card base was something I found in my stash.  I think this will be a perfect male or kid birthday card, don't you? I decided to take a border from the Element sticker sheet to finish off the inside.  Hero Art's "All Occasion Messages" had the perfect little happy birthday sentiment to finish it off with Archival "Jet Black" ink. The second card is definitely for a lady.  I pulled out the "So Sophie" 6X6 pad, Basic Grey "...

Birdie Birthday

Image
How many nursery rhymes pop into your head when you think of rain?  Undoubtedly a few.  Today's 3 Girl JAM challenge is all about April Showers.  The Cricut "Imagine More" cartridge had the perfect image for the theme so I decided to use it to get started.  3 Girl JAM Red crinkle ribbon from the Red, White, and Blue pack was the perfect accent for this card.  Unfortunately, this color is not currently available, but there are other reds available and some new colors are coming soon. Other supplies: Echo Park  - Dots and Stripes 6X6 pad Spellbinders - Labels #5 Archival Black ink Adhesive Glossy Accents Red Stickles Stampendous - "Happy Messages" stamp set K. Andrew Designs - "Splashtastic Summer" stamp set 3 Girl JAM Bowmaker (found here ) In the video, I not only walk you through the card, but I also show you how I made the pretty little bow with the 3 Girl JAM bowmaker.  It is so simple to use and fun too. So come and play a...

Birthday Balloons and More

Image
Hello, I hope you are having a great day.  I am plugging away at birthday cards. I thought I would share 3 of them with you today.  Grab some Daffodil and Harvest Orange 3 Girl JAM ribbon and come and play along. I must admit that this card was really easy to make and I had a lot of fun doing it.  Here's what I used along with the 3 Girl JAM ribbon: Basic Grey - "Life of the Party" 6X6 paper pad and element stickers. Adhesive Blue cardstock cut at 5.5"X8.5" Dusty Durango ink - Stampin' Up Hero Arts - All Occasion Messages (inside sentiment) Operation Write Home - Bonus Sketch #13 (Click here to get yours) Now for the bonus cards... If you look at the purple ones closely, you can see that the purple floral paper is slightly different on each of them. Paper - Paper Trey Inc - Plum Pudding and Vintage Cream; My Mind's Eye - So Sophie 6X6 pad Rich Razzleberry ink - Stampin' Up Daffodil crinkle ribbon - 3 Girl ...

Gift Card Holder for a Guy

Image
We all know that you can use ribbon on cards for girls right?  Of course, its great for holidays and babies.  You can even squeeze it in on kid's cards now and then.  But how about those cards we need to make for all the guys on our lists?  Today, I'm going to show you that you can.  So grab your 3 Girl JAM Harvest Orange ribbon and come play along. I wanted to make a little card that I could tuck a gift card into.  I pulled out my Cricut Artiste cartridge from Close To My Heart and cut this little card at 3" using the card feature and the "j" key.  I pulled a brown sheet of 8 1/2" X 11" cardstock from my stash.  Since I had everything loaded, I went ahead and cut 2 cards out at the same time.  Now I have a card to use later. I pulled a piece of paper from the MME "Fine and Dandy" 6X6 pad and cut a piece at 2 7/8" X 3 7/8" for the back and a piece at 2 7/8" X 3 5/8" for the front.  I then found my "Happy M...

21st Birthday Card

Image
It's time for another birthday card.  This one is for my very special niece who is turning 21 today.  I am also celebrating the fact that she should have received this card ON TIME!  Woo Hoo!  That's not been happening much lately.  My niece has been counting down to this day for quite awhile now.  I knew that I had to make a special card. Here's what I used: 3 Girl JAM "Sunflower" ribbon Basic Grey - "Shine On" 6X6 paper pad Basic Grey - "Life of the Party" - "Small Details" chipboard stickers Stampendous - "Happy Message" stamp set Provo Craft Alphabitties stickers CTMH - Gold Rush pigment ink Yellow card stock form my scrap stash corner rounder Please enjoy the video tutorial for this quick and simple card. Thanks for stopping by.  Remember to take some time to enjoy the little things.

Cake Birthday Card

Image
As much as I love getting ready for Christmas, I still have a lot of birthdays in the month of December.  One day this month I had 4 family birthdays (of course a set of twins in there increases the number of birthdays).  Anyway, it is definitely time to pull out the birthday sets. For this card I used the Basic Grey "Life of the Party" 6X6 inch paper pad and rub-ons.  I also used Stampendous' "Happy Messages" stamp set with jet black Archival ink.  There is a hint of Victorian Velvet distress ink as well.  The scalloped border was punched using the Fiskars "scalloped sentiment" punch.  I hand cut the sentiment "borders". It was a very simple card that is already on the way to its little owner.  I hope she likes it.  Please enjoy the video. Thanks so much for stopping by today.  Remember to take some time to enjoy the little things.

Thank You Notes #2

Image
Good morning everyone.  I've been so busy that I've not had much time to craft and even less time to blog.  Let's just say that my plate is currently VERRRRY full.  That's OK because it will pass. One of the things that I have been working on lately is a Stroke Awareness Campaign for my community.  WOW!  It's keeping me hopping.  I plan to dedicate a post soon to Stroke Awareness so keep an eye out.  There's a lot we should all know about stroke! As you probably know, Saturday was National Scrapbooking Day!  I must say that it was the BEST one I have ever had.  Not because I was able to scrapbook, but because I spent most of the day with my daughter.  She even wanted to go a scrapbooking store (which she hasn't been interested in for awhile).  By the time the day was done, we had also gone to JoAnn's and she bought fabric to recover a 3-ring binder and start her next scrapbook.  We also re-arranged the old family room to make...

"Sky's the Limit" Birthday Card

Image
I really like the colors that make up this masculine birthday card.  It was so fun to make it for my brother-in-law. The printed paper is from a 6X6" pad from My Mind's Eye - Fine and Dandy.  I only used one piece of this paper because it is double sided. The striped kite paper is a scrap from my stash as is the brown.  The solid yellow paper is from Recollections and the stamp from Stampendous' "happy Messages".  The kite is from "Create-A-Critter". You know that I prefer to have the inside of my cards finished, so I used more patterned paper and stamps from K. Andrew Designs' "Of Mice and Lil' Men".  Please enjoy the video. I am linking this to the Paper Playtime: CH #73 - "Say It With Sentiments" Challenge

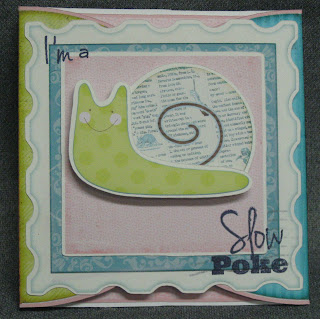
Slow Poke Birthday Card

Image
This is the first card I made using the Cricut Craft Room.  I'm going to really enjoy using this tool.  I was able to change out the pattern on the paper quite easily.  I was also able position the images where I wanted them on the mat.  This is something I hadn't figured out how to do on the Imagine itself.  I like having that versatility so that I can use different sizes of paper.  I really hope my sister-in-law likes this late card. I'm linking this to the  My Craft Spot: Inside Out Challenge Thanks for watching and have a great day.

Faded Flower Card

Image
Here is a card I made for my sister's birthday.  I used a stamping on technique to make the faded flowers.  I sent the red one to her because she likes red.  I trust you will enjoy the tutorial on this super simple card. I am entering this card in the following challenges: Simon Says Stamp - April Showers Bring Spring Flowers   Less is More - CAS 3 Shades of Green (I'm not sure if there is enough white space to qualify, but this was definitely clean and simple.) Have a great day.

5 Minute Card Challenge

Image
I was watching a YouTube video by K. Werner Designs yesterday and she attempted to make a card in 5 minutes.  You can see this fun video here .  I watch her videos every week because she makes such neat cards.  At the end of her video, she challenged others to do the same thing.  Here's my attempt. Did I make it in 5 minutes?  That's kind of laughable.  I was close, but then had a mishap.  You'll have to watch the video.  It was fun to try though.  I really like the way the card turned out, so I made a similar one a second time. I am linking this card to the following challenge: Love to Crop - Say Anything Thanks for watching and have a great day!

Cupcake Birthday Card

Image
This is the card that I made for this month's Card Exchange Club.  The theme was kids birthdays.  I chose the color scheme based on an old paper pad of printed paper from Provo Craft.  I then used paper from the Recollections Soda Pop collection to coordinate.  White, brown, red, and black card stock were pulled from my stash to complete the card.  I used glitter glue from Studio G to add some extra interest to the cherry and the D'Vine Swirls Cuttlebug folder to frost the cupcake.  The cupcake was cut from the Create-a-Critter Cricut cartridge. Thanks for watching and have a great day!

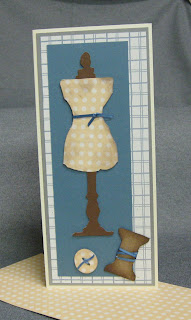
Dress Form Birthday Card

Image
I made this card for a lady in our church who is celebrating her birthday sometime soon.  The ladies of our church have a secret sister program and I told Christine's secret sister that I would make a card for her.  Christine, if you see this, remember that I am not participating this year.  I often make cards for others to give :).  The mat on the inside of the card actually forms a little pocket for a gift card, check, or cash.

Card Exchange Club - Male Birthday

Image
This month's card exchange is coming up on Wednesday.  I finished this a little ahead of time as I begin a long work week tomorrow and wanted to be sure this was done.  Tim Holtz has perfect supplies for making masculine cards.  I used the following Tim Holtz products: Distress Ink - Tea Dye Distress Tool Retro Grunge paper stash pad "The Journey" stamp set "Artful Muse" Alterations embossing set I also used the Cuttlebug, ATG, craft colored card stock, and a stamp set from Stampendous. Hope you enjoy the video.